The creation of user results is simple, if the user becomes more and more familar with the several dialogs for the filter conditions and the associated size calculation mode. The steps for creating a user result are described below.
Step 1:
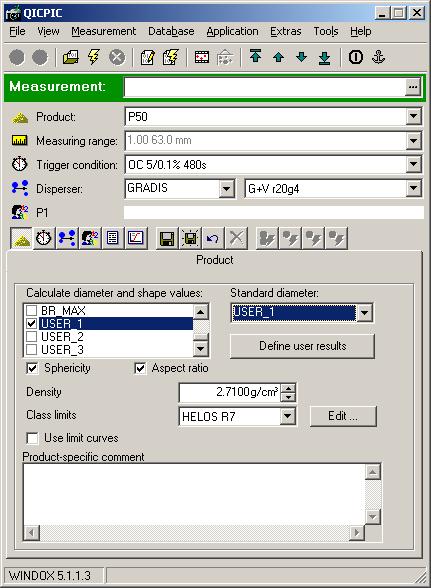
Select the product tab sheet of the QICPIC sensor control.
Step 2:
Mark one of the results USER_1, USER_2 or USER_3 in the selection box of the calculation modes. For simplification only USER_1 is used in this example. Select USER_1 as the standard calculation mode (otherwise the results won't be presented in the diagrams).
Step 3:
Press the button "Define user results". The following window will appear.
Step 4:
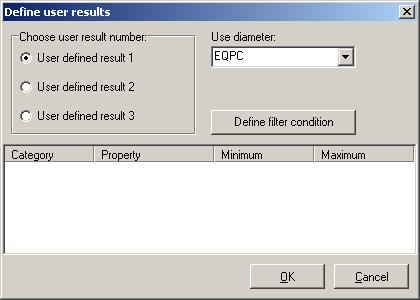
Set the radio button to "User defined result 1" and select the associated calculation mode from the selection box "Use diameter" (e.g. EQPC).
Step 5:
Click on the button "Define filter condition". Subsequently the window for the filter conditions is displayed.
Step 6:
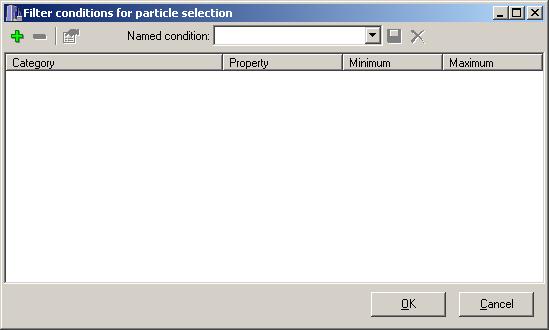
Now there are two possibilities:
a)
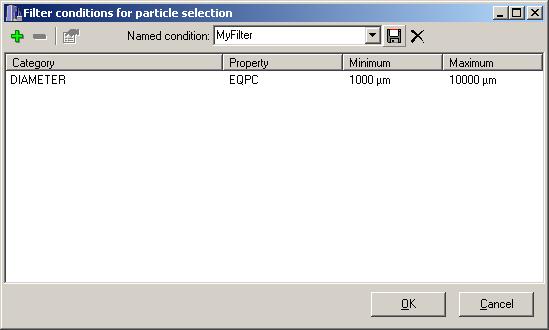
Click on the green "+" to add a new filter condition. Another window is presented.
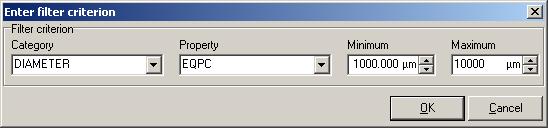
Here the filter condition is specified. The category in this example is "Diameter". The above filter condition means, that only particles with a EQPC diameter from 1000?m up to 10000?m will be taken into account.
Choose the desired category in the left selection box. The following categories are available:
If "diameter" or "shape" are selected, the property has to be selected afterwards. Depending on the category the calculation modes or the shape descriptors are shown. Subsequently the desired interval has to be specified by the "Minimum" and the "Maximum" values. Then click on the "OK"-Button.
If further conditions are desired, click on the green "+" again and specifiy another filter condition, and so on. All conditions have to be matched by particles, which shall contribute to the distribution (the conditions are linked by "AND").
It is recommended to save the set of filter conditions. Type a name in the selection box on the top and confirm by clicking on the disk symbol on the right-hand side of the box.
b)
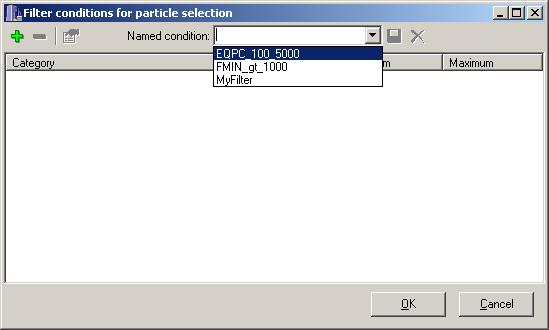
If a set of filter conditions has been saved already, the set may be selected from the selection box on the top of the window.
Step 7:
If have defined an appropriate set of filter conditions, confirm by clicking the "OK" button. Subsequently the user result window looks like the next window.
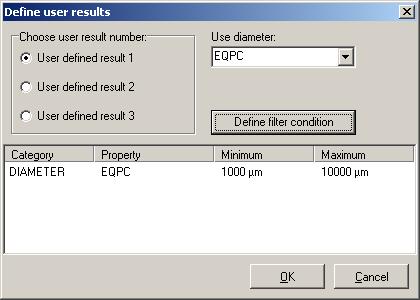
The set of filter conditions is displayed now.
Step 9:
Confirm the dialog by clicking "OK".
Step 10:
Save the modified product by clicking on the large diskette symbol on the top of the product sheet (otherwise the modifications do not affect the evaluation).
Step 11:
Evaluate the desired measurements of this product again. The user result (distribution) will be displayed in the distribution and the shape diagram respectively.
Related topics: